To collimate a telescope means to align all the optical elements it contains so the image produced is optimal. Any mirrors (primary/secondary) or lenses must be centered relative to each other, and the respective optical axes must become parallel. A refractor is typically collimated by the factory, while a Newtonian reflector or a Schmidt Cassegrain Telescope (SCT) must be collimated often by the user to provide optimal image quality. Bad collimation is perhaps the most common cause of poor image quality in amateur telescopes.

A very detailed and illustrated procedure is also provided by Sylvain Weiller at http://sweiller.free.fr/collimation.html. It discusses collimation using a webcam, and it is an excellent resource.

My C8 came with 3 Phillips collimation screws that required use of a screwdriver when collimating. Using a screwdriver is very inconvenient in the dark and cold. You also run the risk of hitting the corrector plate with the screwdriver. Not good! Luckily, there is an easy and cheap fix. I bought Bob's Knobs which replaces the Phillips screws with knobs that require no tools to be used. This may sound trivial, but it isn't. It makes collimation a joy, and it is strongly recommended. The image below shows my C8 with Bob's Knobs installed:


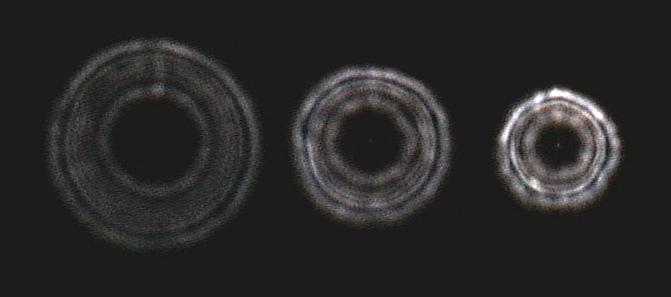
This simple tool consists of a Christmas ornament reflecting the light of the Sun. Place it as far away as practically possible, preferably 100m or more, but a few meters will also do if required. Make sure the sun is behind you and focus on the reflection in the ornament. The images should be similar to the images on the top of this page, but if the ornament is too close, you will not get perfect diffraction rings. Then do the best you can, and check with a real star later. You should achieve good results.